

Yet another wall shelf project. This time it is for my oldest sister, Unni. I got a text message with an image and “show this to your wife, she’ll love it!”. Subtle… But hey, it’s woodworking! And I do have some oak at the ready.
It’s a simple enough design. A rectangle with two boards attached to create shelves. A perfect design for utilizing the tops of old tables one can get for free, so there’s a business idea for ya!
We start by preparing some oak planks. Quarter sawn white oak, to be specific.

I cut the plank into three pieces, about 60cm in length (about 2′). This particular board was the result of a minor mishap when I cut it from the trunk. The blade wandered for some reason, and the cut became a bit wavy. In addition, some “drying deformation” took place and made the plank very wavy. Good thing it was a bit over 3cm in thickness (13/16”)..
I cut the plank down to rough lengths. No need to flatten the whole board at once – you loose way too much thickness that way!
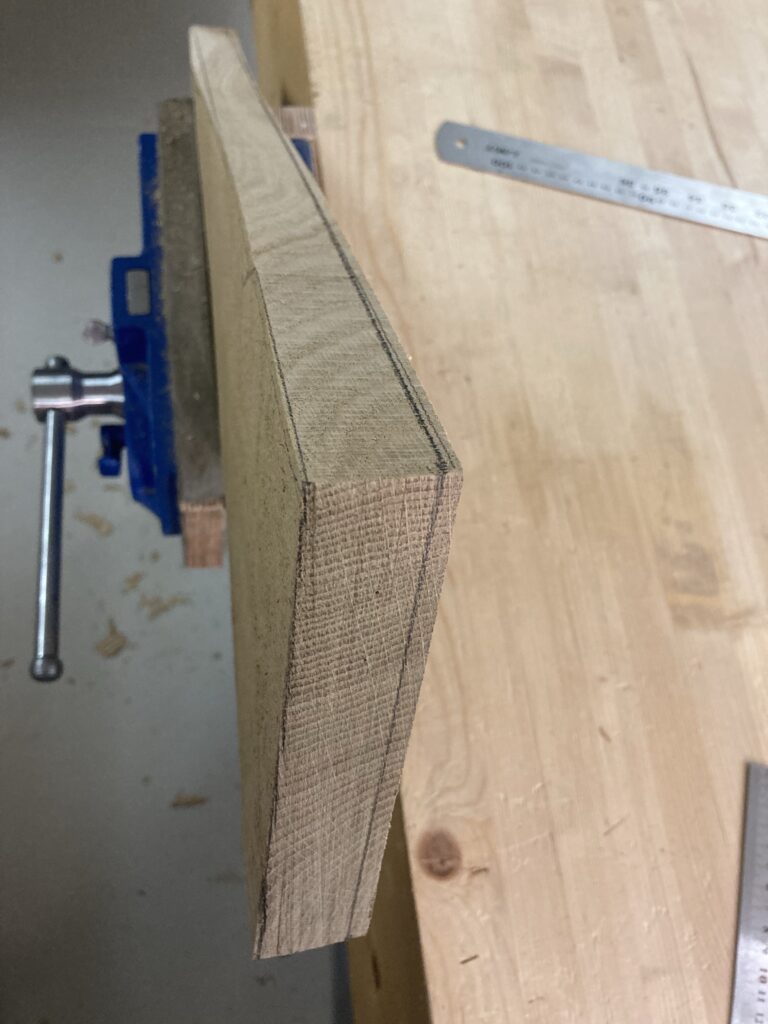
I drew on a few lines to see if I could get a 25mm (1”) board out of this section. It is a bit of a risk since the wood clearly wants to do its “thangg” here, but since the moisture content level is slightly less than 9% I think it’ll be good.
To reduce the offerings to the dust extractor bin, I flattened one face of each board to the point where it stopped wobbling around on the work bench. I made sure I had a good reference surface to register the plank when I passed it over the jointer. Flattening by hand is also a possibility, and not that hard – or that much work, really. But it is not a job I enjoy doing except for smaller stuff. Or REALLY big stuff! Flattening a big slab is actually a lot of fun, and you get a real boost from the satisfaction of a job well done. It is good cardio, too. The Lord knows I need that in my life…

After I jointed one face, I dressed it with my No. 4 smoother so that it was dead flat and no machine marks was left.
I then squared one edge. This can be done on the jointer, but the fence on my jointer is a piece of owls barf. And I have a healthy dose of respect for that machine, so I don’t like to use it any more than I have to. Besides, squaring one edge is childs play with a decent hand plane. The 5 1/2 is really good for boards this thick.

I then used the thicknesser to process the three boards to uniform thickness.

There was some flat sawn parts on those boards, and that can be a recipe for problems down the line. These boards were way too wide for what I needed anyway, so I ripped them down some. This created parallel edges as a bonus, and a few swipes with my No. 7 jointer made sure those edges were dead square and straight.

The next job on the list towards 6S was to shoot the edges square. The No. 4 smoother is great for this if the edge is “almost there”. A very light setting and a sharp iron, and off we go!
Typically, I make a slight bevel on the far end before I start shooting the entire edge. This makes sure I don’t blow out the fibres on the far edge. As soon as I get a shaving all the way across, I stop and check. Any out-of-square vertically is fixed using the lateral lever on the plane (and that is why obsessing over “dead 90 degree angle between sole and sides” is a waste of energy!). I watch the far end carefully and stop as soon as that initial bevel is removed. One stroke at a time, check, repeat if necessary.

I did not bother with both ends, as I knew I would have to cut this thing to length anyway. In retrospect, I could’ve dropped shooting the ends too, as I ended up cutting off a piece from both ends. Oh, well. Practice is a good thing.
I made spring joints for all the boards after deciding their order and orientation. Since I wanted the rays to go upwards, I ended up with one board where the grain runs in the opposite direction. Not a problem with hand tools.

With that task done, I glued up the boards into a panel. I used Titebond III as it dries into a light tan color, which becomes invisible in oak. Not that you would see the glue line anyway, but attention to details is good.
Hardwoods benefit from having glue spread on both surfaces. I laid down a string of glue and used my patented glue spreader wiper – my index finger – to create an even film of glue on both surfaces. After clamping down, I wiped off any excess glue. I make sure to get small pearl strings along the joint, but you’ll never see glue oozing out of my joints like gravy on turkey! I am not concerned about glue getting on my surfaces either, as I will use my smoothing plane anyway. There will be no glue left then. 7 sash clamps got the job done, and a couple of hour later I could start smoothing. No need to leave the clamps overnight! Not for non-structural joints, and not if the joints are as well made as these was.

Some jobs are more satisfying than others. Smoothing quarter sawn white oak is really up there! Look at the shavings – and look at those rays! Love it!


The No. 80 cabinet scraper is a great problem getter-ridder-offer when the grain goes wild. It leaves a glass smooth surface, even going against the grain! There were a few places where I got a hint of tearout, so the cabinet scraper was the best weapon to fix that.
One of my spring joints had a minor flaw in it – I think I started a shaving on the end, stopped – and forgot to fix the small step I created. Since the glue line were compromised, I had to cut a bit of that end off. No biggie, really.
I used my biggest combination square and a steel ruler to draw a line all the way across. I then marked 50cm from that line and struck the second line so that the panel would be a hint over the target of 50 cm.

Some people argue that combo squares are not reliable and that they don’t trust them to be square. That is a bit ridiculous – if any square produces a line at 90 degrees to the reference face, it is in fact SQUARE! Of course this needs to be checked, and on combination squares you have to check in shorter intervals compared to what a try square needs. Another method for checking squareness, is to measure the diagonals on a rectangle or square marked with the combination square. Provided the opposite edges are parallel (measure the width), you should be dead on if the square is in fact square. I got less than 0,5mm discrepancy, and that is well within the margin of error here. It is in fact exactly the same result I got when I made a small side table, proving my square is still dead square after nearly two years. QED!
I used my track saw to chop the ends off of the panel. I use a piece of foam insulation as a sacrificial surface when I do this. An offcut from one of the planks served as a support for the track. You can see my Dust Right hose in use – a good piece of equipment! The adapter fits my track saw perfectly, and there was virtually zero dust coming off of the saw!

I then planed the edges with my smoothing plane to make them crisp and nice. This got rid of any small tearout from the saw – and the obligatory burn arcs…

Next up: the shelves. We’ll look into that on the next page.