We are bitten by the gardening bug big time, and especially growing veggies, fruits and (in time) berries. We did not have a greenhouse, something we really missed. So I built one.
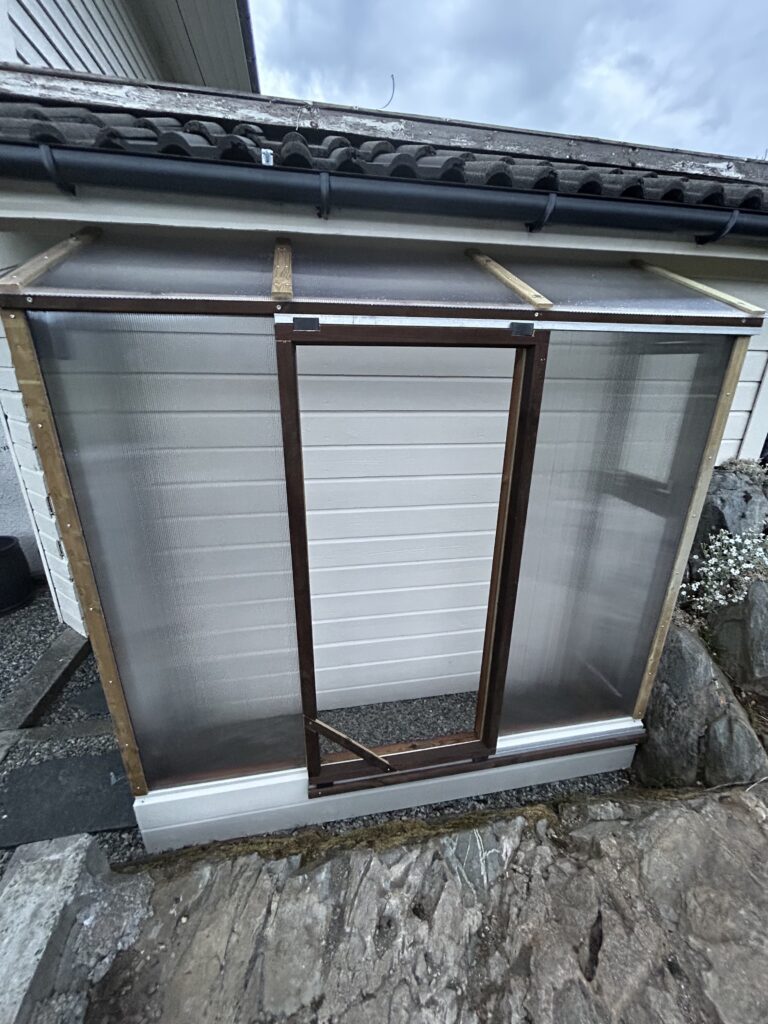
I had a decent selection of Cu-impregnated wood leftovers from other projects lying around, so I decided to built a small greenhouse in a location where nothing useful could be done, really. The area is 2 meters wide and 50 cm deep (6.5′ and 20”), which would be sufficient for a greenhouse of modest size. It’s narrow, but acceptable.
I have pondered over this area since we bought the house, because the arched door is REALLY poorly made, the small slanted roof makes no sense since the rest of the roof is flat (why the previous owner built a dead flat roof in a part of Norway known for lots of rain, is beyond me…), and the small area could not be used for anything. Then one day, my wife and I was talking about this and we were overheard by Lilly, our youngest. She announced that she “had a great idea!” – which she indeed had: build a greenhouse there!
Have you ever had a moment where the lights come on, there’s horns blowin’ and you want to smack yourself senseless because the idea is so incredibly simple and obvious? Then you know how I felt!
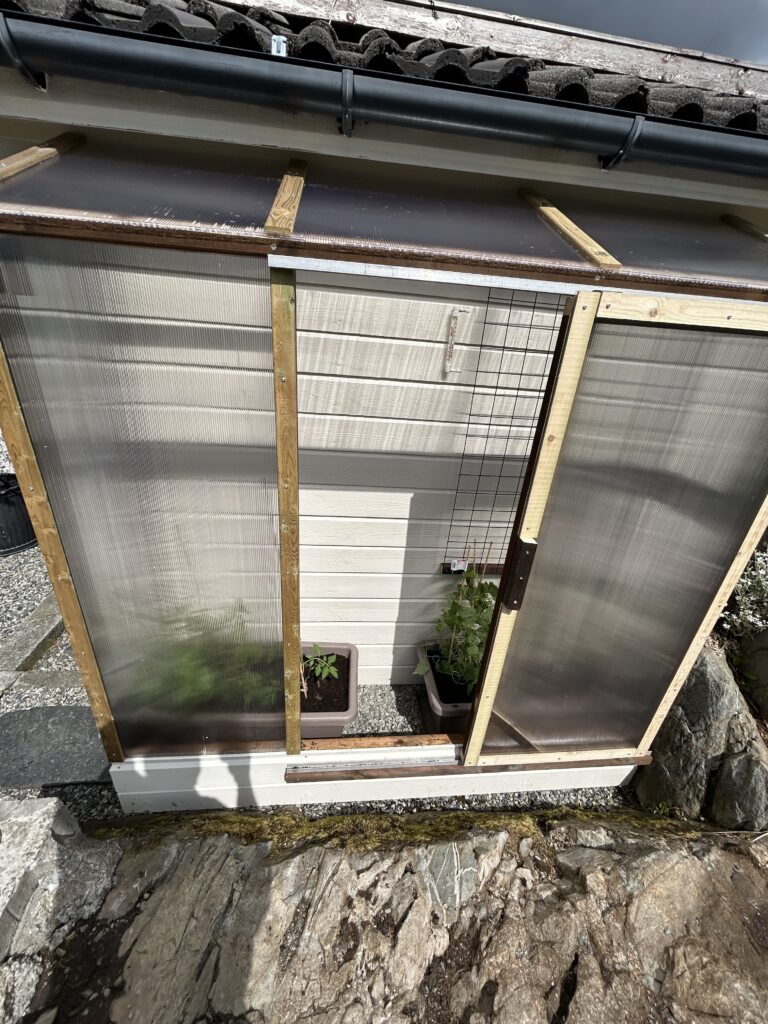
And this is the backdrop for this small greenhouse. It is meant to be a temporary solution, because I have some plans to rebuild the wall, the arched doorway and the roof. As you can see in some of the images, on the right hand side the rock face has not been blasted away enough. A part of the rock extend inside the room behind the green house, so that rain water ends up inside the room. It is a cold storage space, similar to a carport, so the water does not damage anything. Still, I want the problem mitigated. The plan is to tear down parts of the walls, split off the offending rock, build a new wall from LECA blocks (a lightweight concrete based product, similar to cinder blocks) and build a more permanent greenhouse. But that is for the future, and this temporary greenhouse will provide experience and “proof of concept” prior to any major investment.
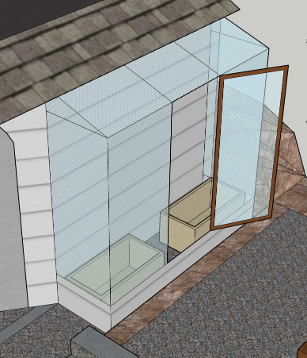
I fired up Sketchup and made a drawing:
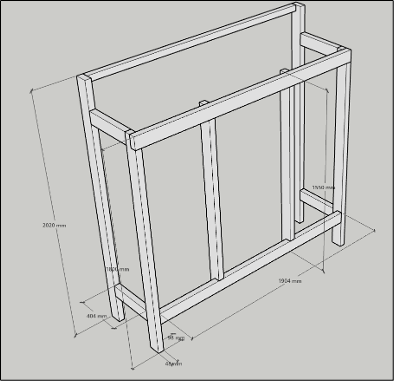
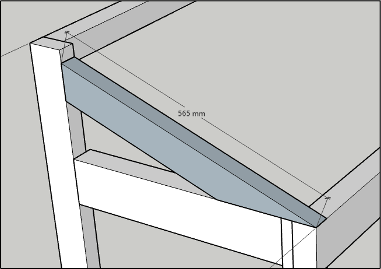
From that I constructed a framework that would fit inside the area:
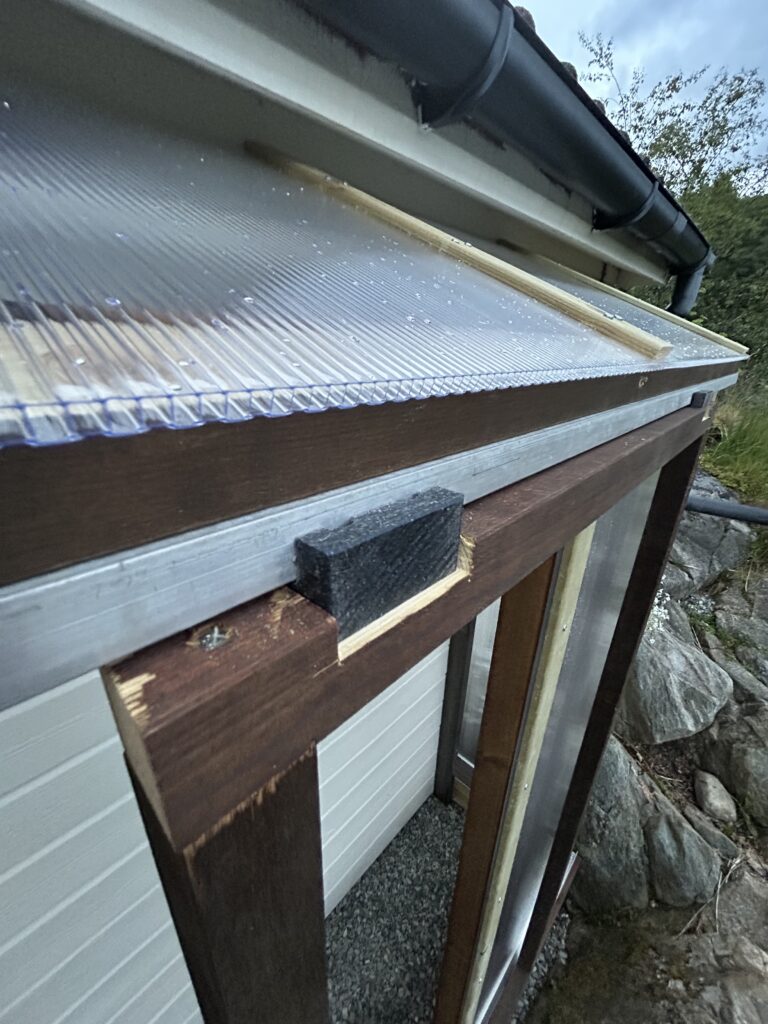
Visualizing this in 3D is a great asset, as I can get any measurement I want and solve any potential issues. For example the rafters – I had no idea about the angle of the roof, because I worked using relative dimensioning here. The height of the back was decided by the wall on the house, and the front height was determined by adding up two rows of siding boards plus the height of the polycarbonate panels. Therefore the angle is what it is – I just measured for the rafters and got on with it.
I got the measurement by going corner to corner (the back stud was later cut down to match the profile of the roof), measuring from the intersection with the back stud to the front of the front stud:
From there I went into building overdrive, and forgot to take any pictures of the process. But the construction is really simple. I cut all the pieces shown in the image of the frame, and screwed them together.
I bought some sheets of 6mm polycarbonate panels, which I cut to size with a sharp knife and a steel ruler as a guide. One side of the panels has UV protection, so it is important to mount the panels with that size facing outwards or they’ll just “rot” over time.
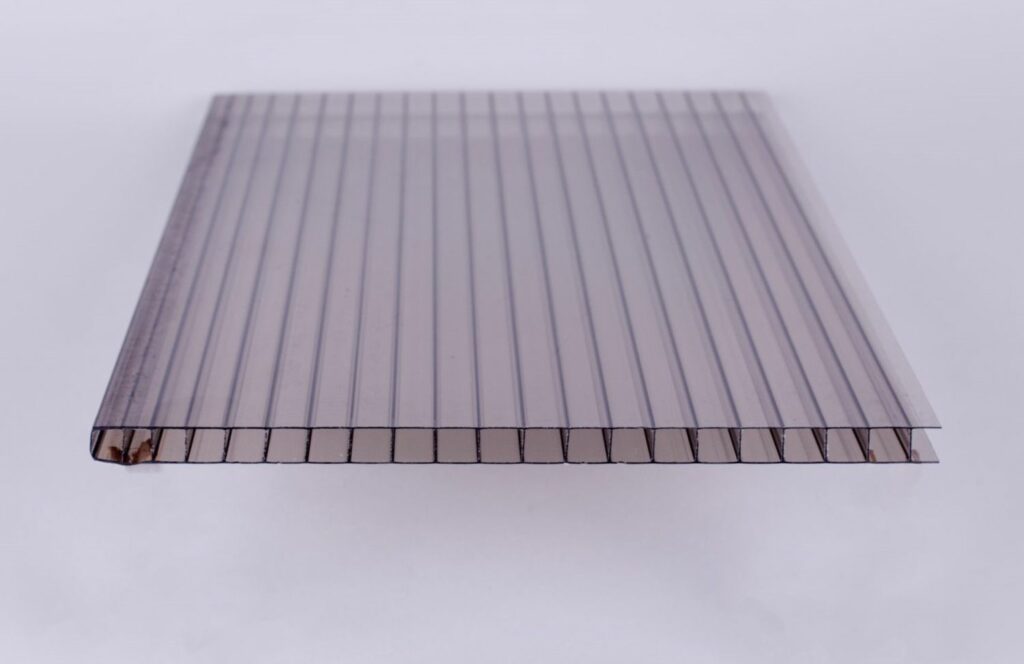
To secure the polycarbonate panels, I ripped thin strips of Cu impregnated scantling boards. I predrilled and screwed them to the framework, sandwiching the polycarbonate panels.
Most of the wood I used was a special version of Cu-impregnated wood sold here in Norway: Møre Royal. Basically they cook the Cu-impregnated wood in a special oil under vacuum. The oil is also sold in tins, which I used on a “pergola flower portal” I made earlier. You can buy the oil with different pigments to add color. And as you will see, I had some regular Cu-impregnated boards in the mix, which I gave a coat of the oil. They are not as dark as the cooked wood, but close enough. A second coat would help, but I decided it is good enough.
After assembly, my wife and I scooted the greenhouse to its new home:
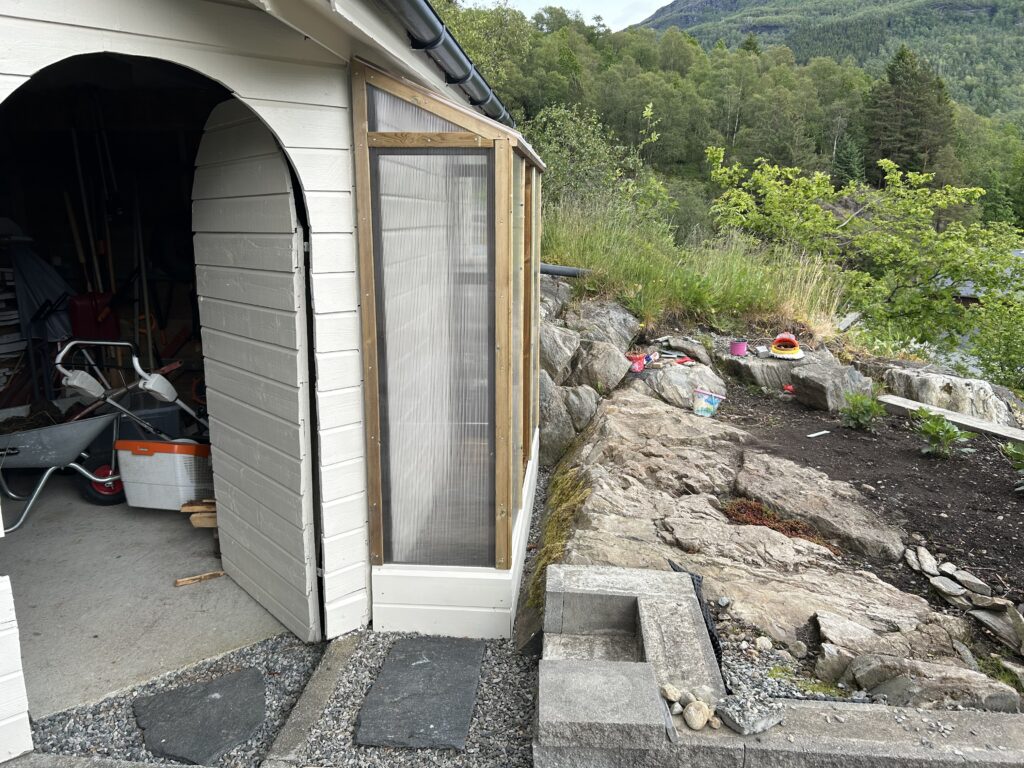
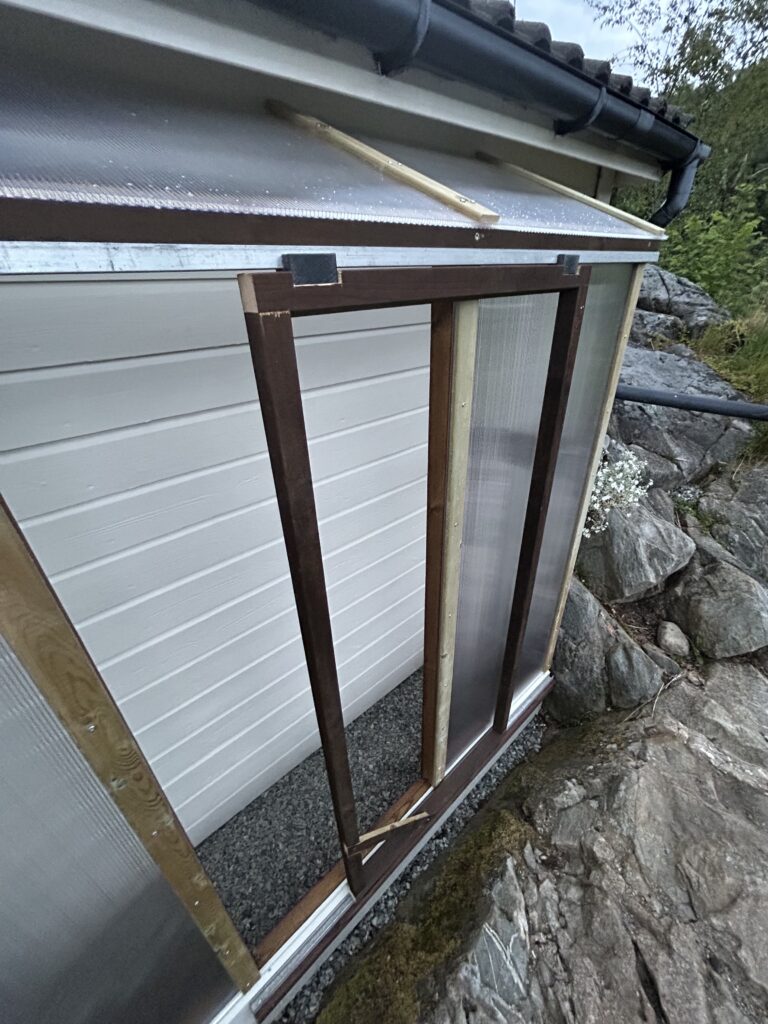
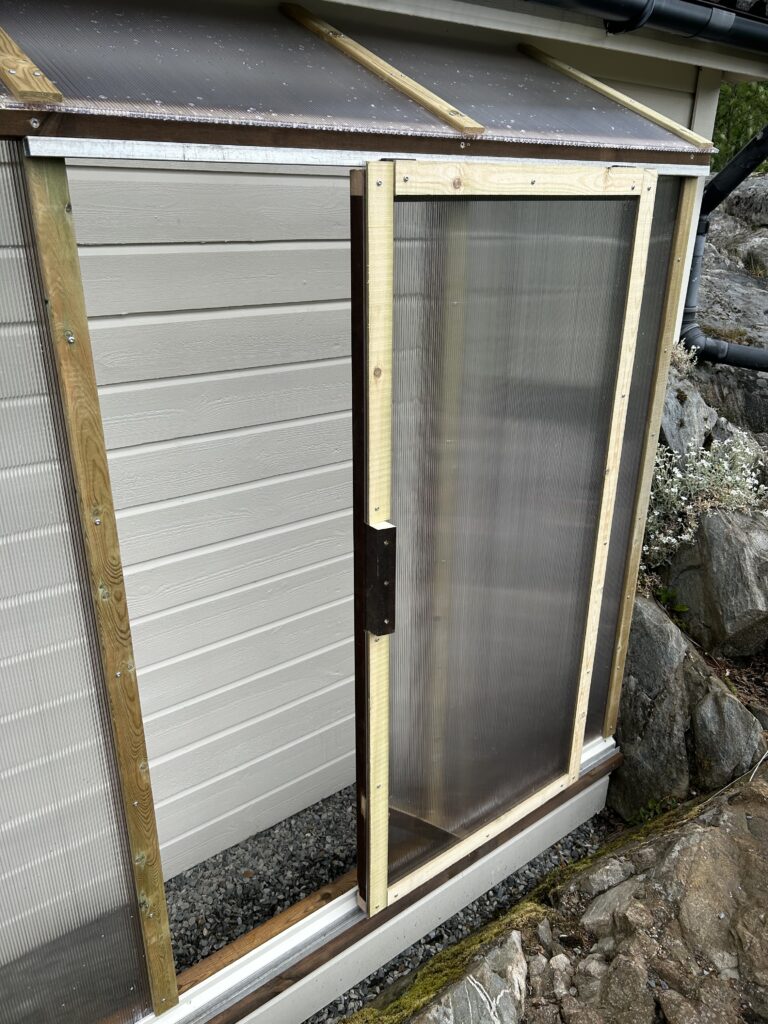
The one thing I was not sure about, was the door – would a normal door be possible, or would it interfere with the rock in front of it? Turned out that my suspicions were indeed correct; the only way to have a normal door would be to make the doorstep a LOT higher. No can do!
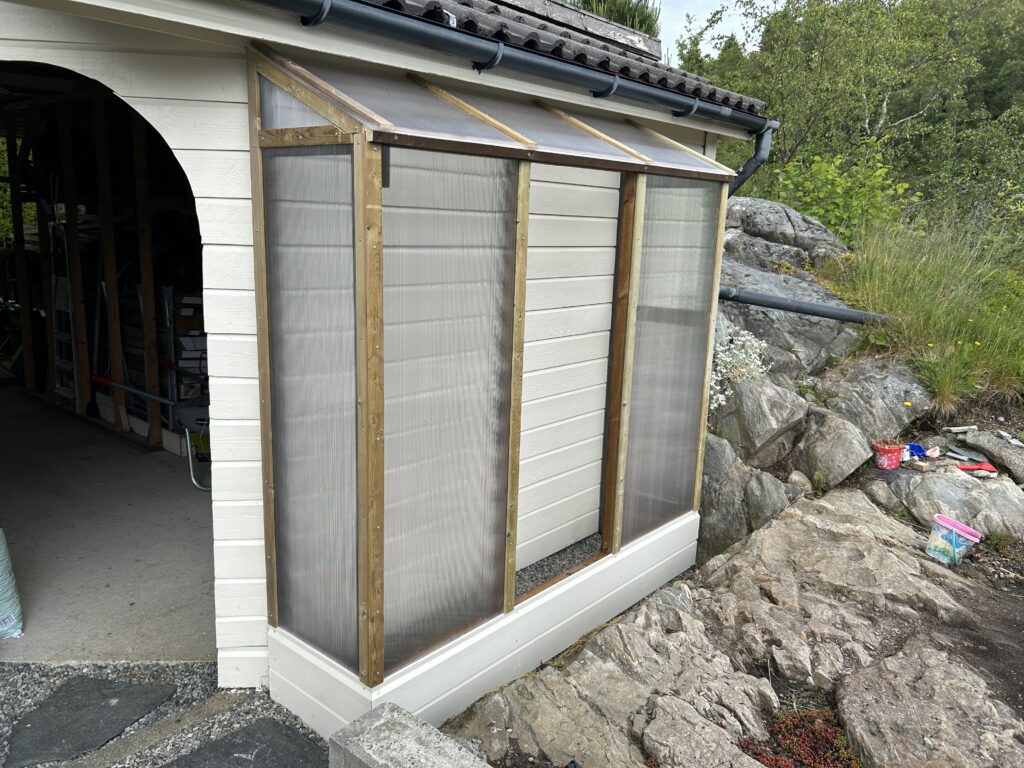
So I decided to make a sliding door in stead. I got hold of some U-shaped aluminium profiles (won’t rust!) that act as rails for the door. They are screwed to some slats, which in turn is screwed to the front of the green house.
I had a block of POM / UHMW plastic (not really sure what it actually is, but it machines wonderfully), and I made glider blocks from that. I cut a dado for the aluminium U profile and countersunk for screws.
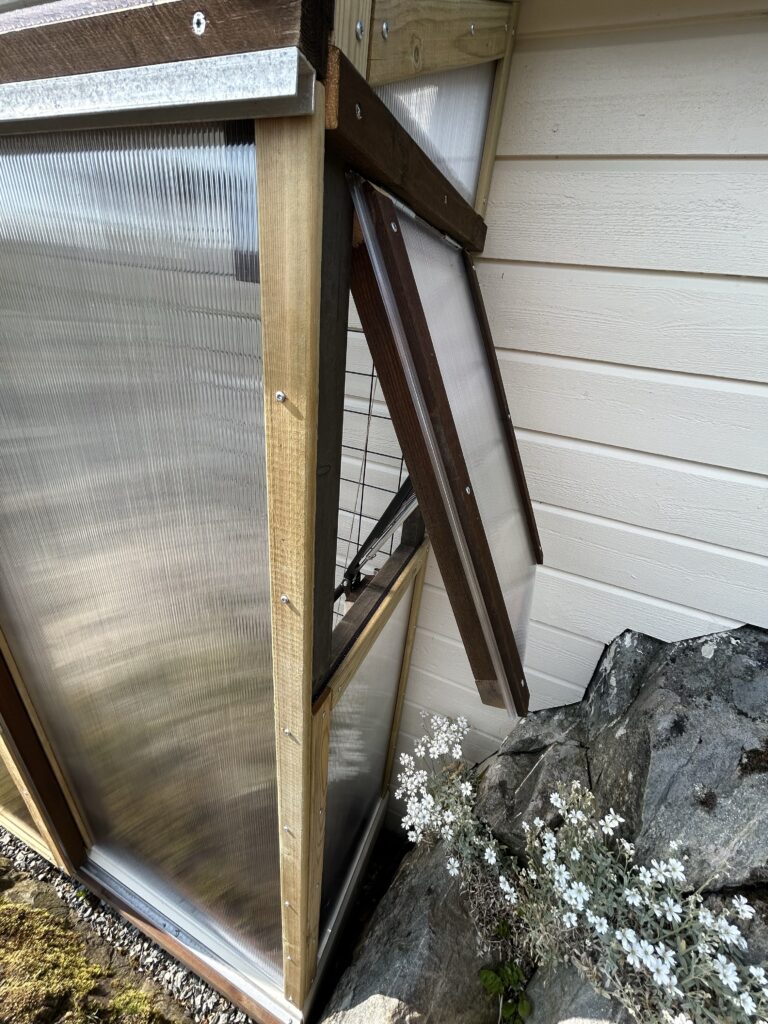
To avoid a huge gap above the door, I cut a slot in the door for the blocks so that the top rail almost touches the aluminium profile. After a bit of fettling, the door moved freely and relatively easily along the rails.
Here’s a shot of the entire door without the polycarbonate panels. To stiffen the door and to avoid problems, I mounted a diagonal brace at the bottom of the door. This, combined with the fact that the polycarbonate panel is screwed to the door frame, should keep the door square and in check.
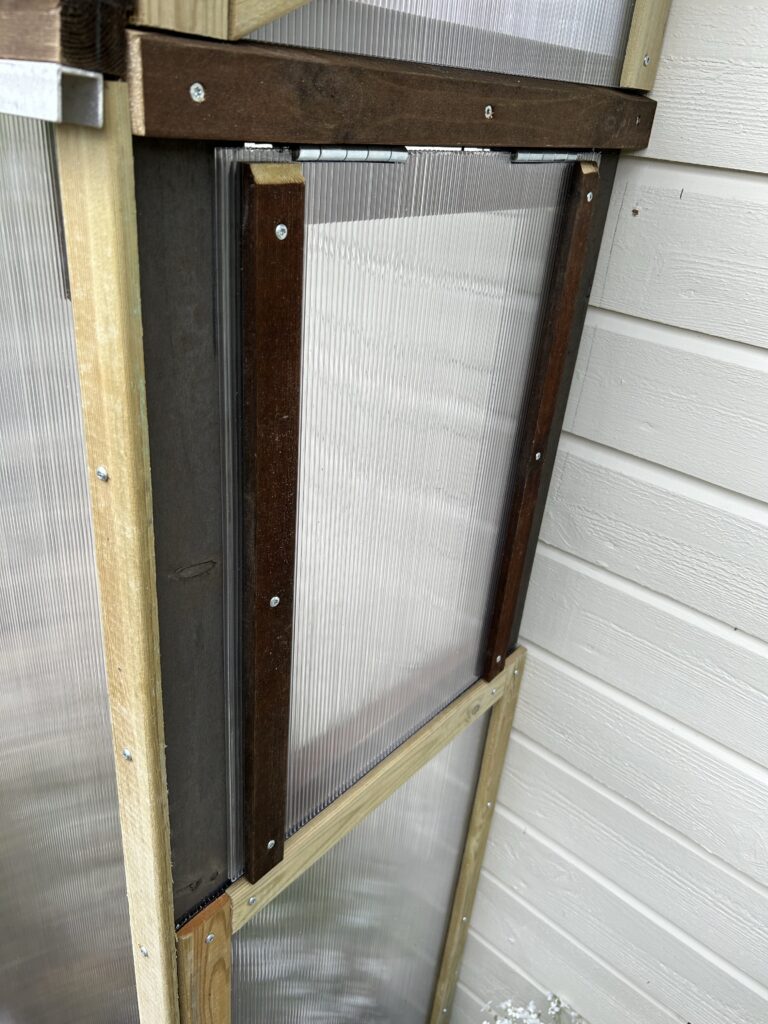
After mounting the polycarbonate panel to the door, I screwed a door handle made from a piece of scantling board. The polycarbonate panel was notched for the door handle.
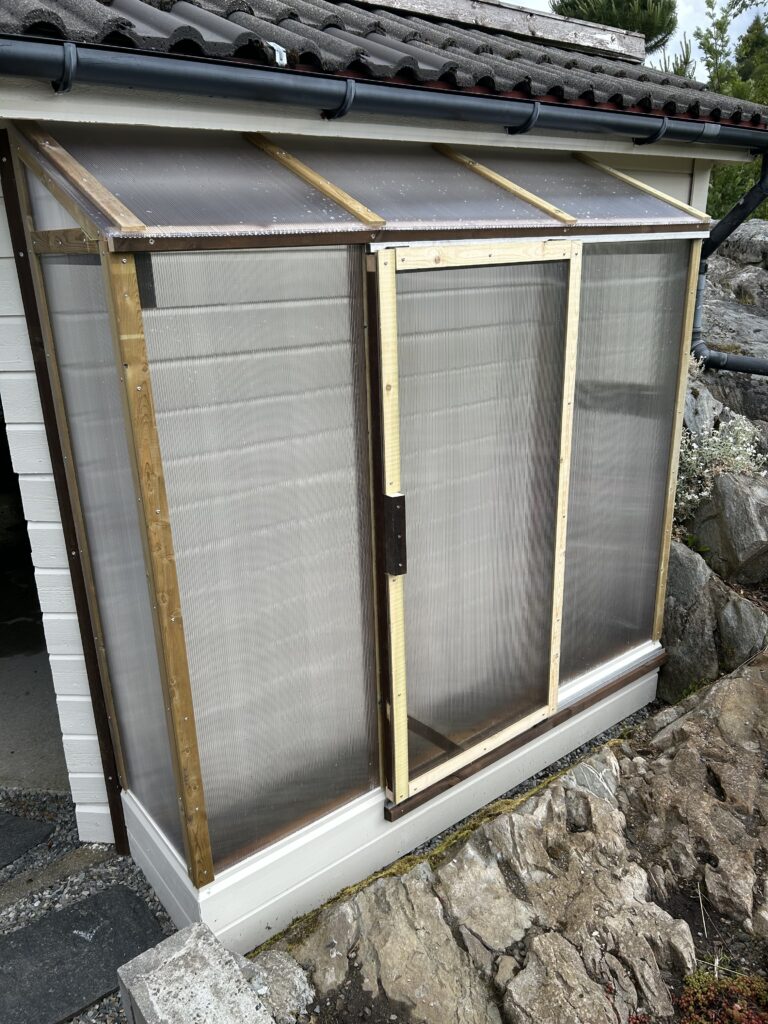
The door slides easily enough, but at the same time it has enough resistance so that it won’t move out of position. This is good for warm summer days when we need extra ventilation; we can just slide the door open and it’ll stay put even if it is windy.
On the right side, I made a simple window. A latch is installed to lock it shut if needed. The following image was taken before the automatic opener arrived.
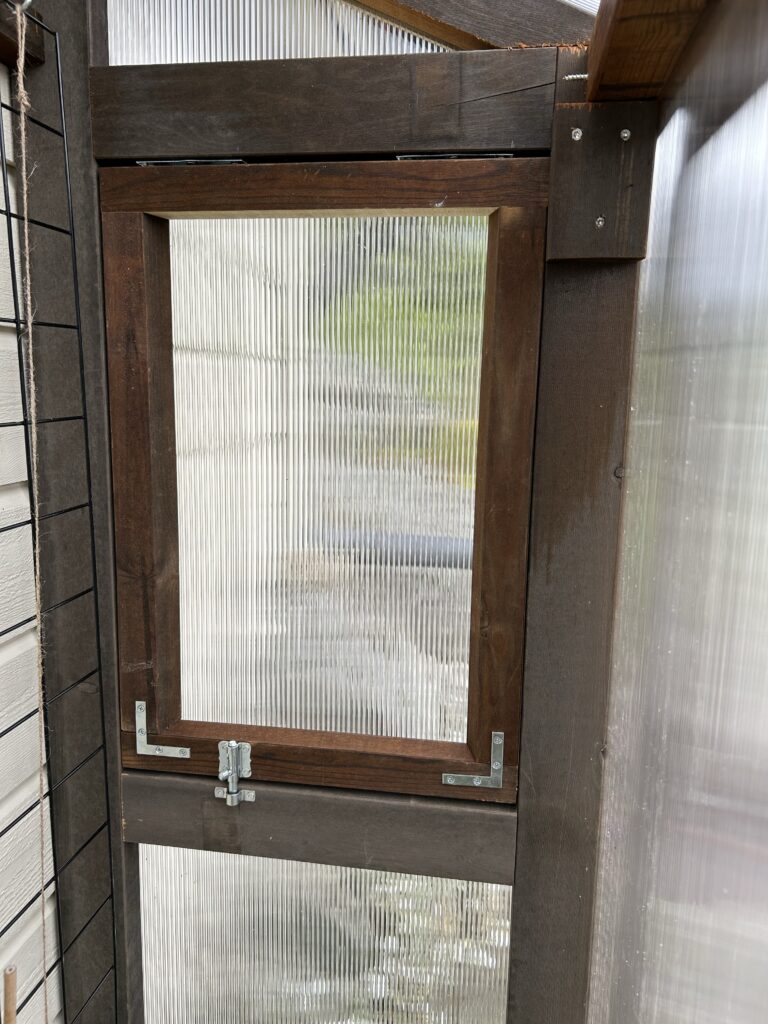
I ordered an automatic opener mechanism, which opens the window when the temperature exceeds a certain (adjustable) level. The hotter it gets, the more the window opens. Cool stuff.

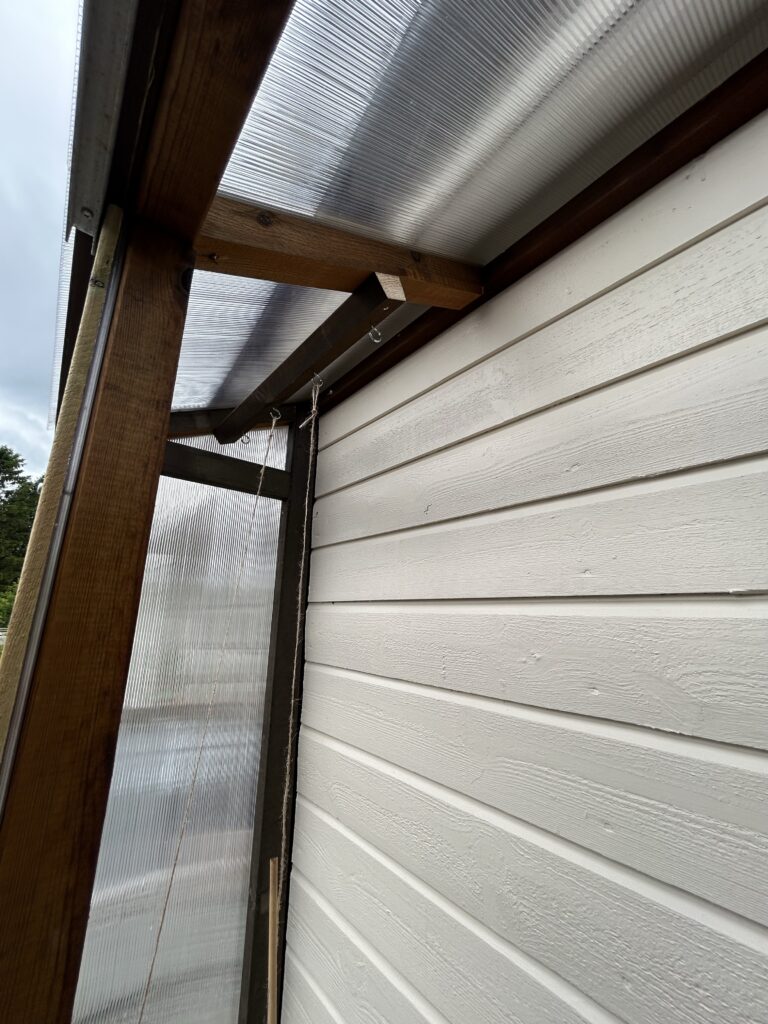
The window is just made from some leftover slats, which I also used above the window to divert rain water from the channels in the polycarbonate panels.
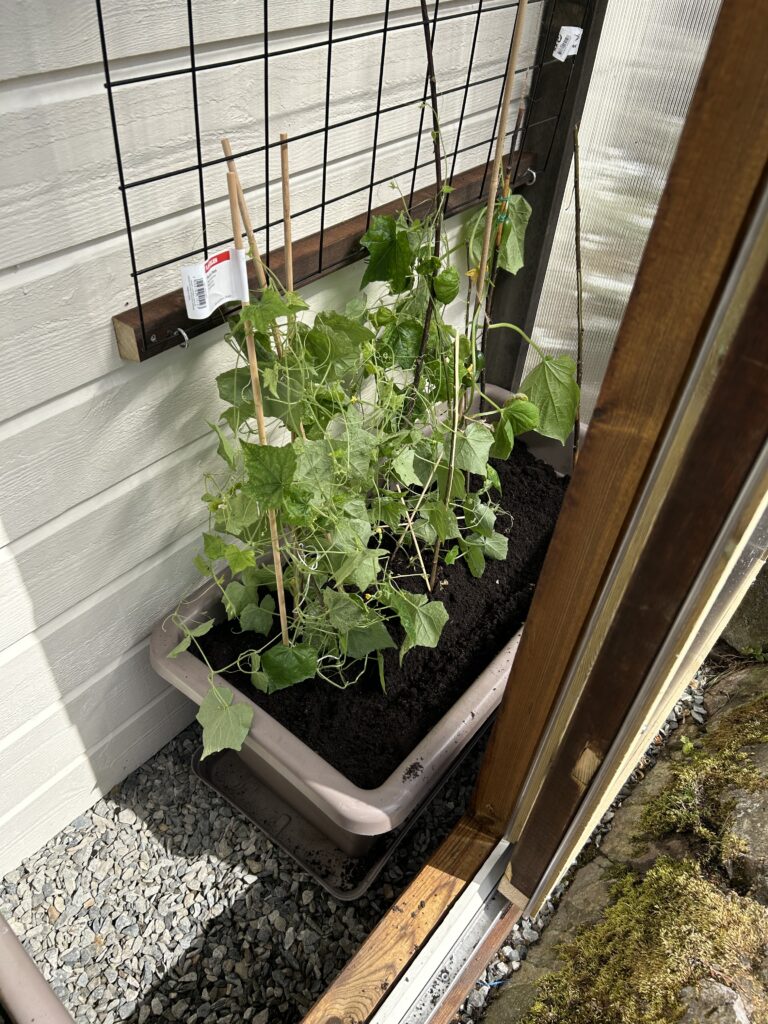
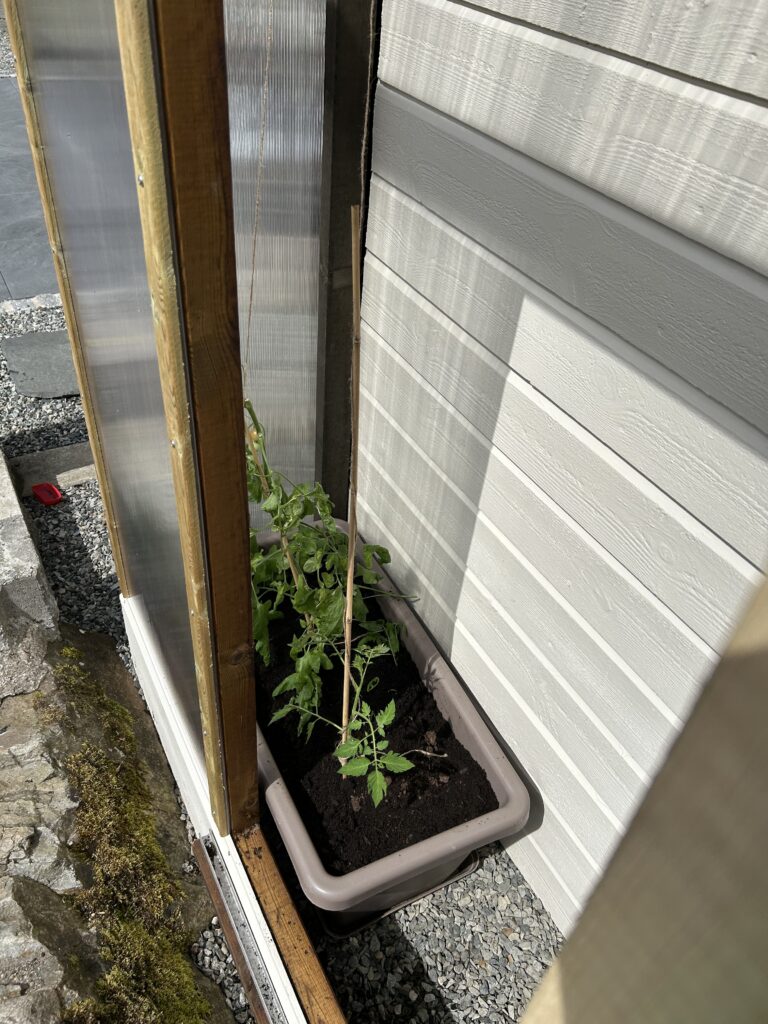
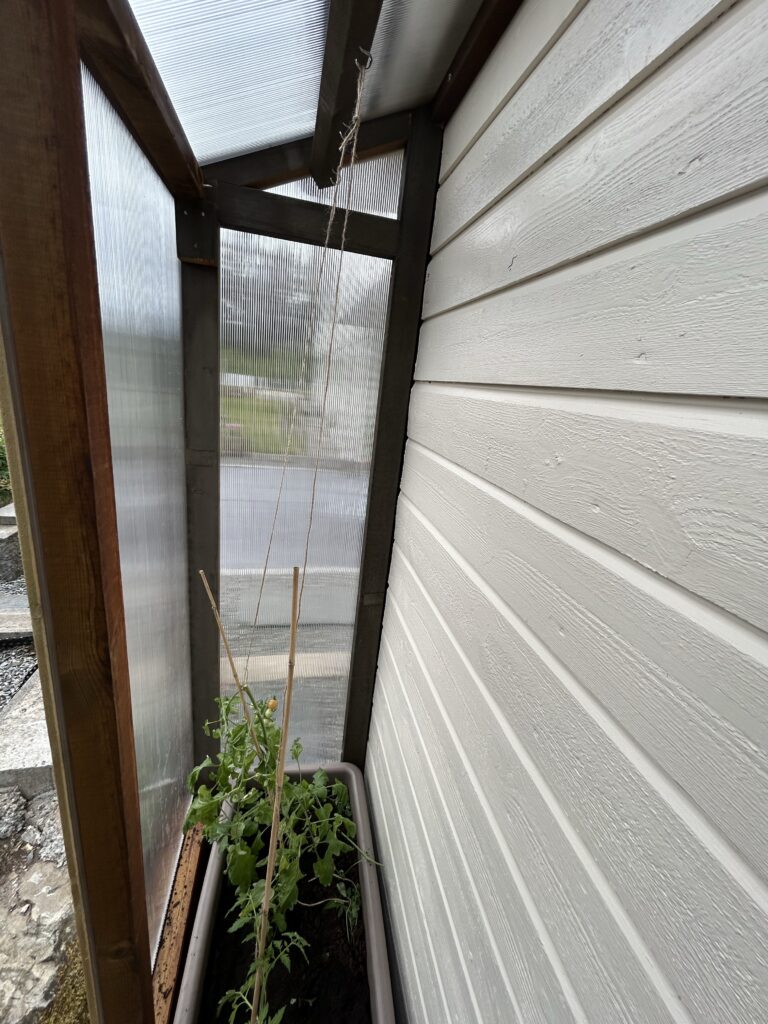
I mounted some hooks for rope for the tomato plants, and a metal grid for the cucumbers to climb on. My wife and I then planted the tomato and cucumber plants in troughs.
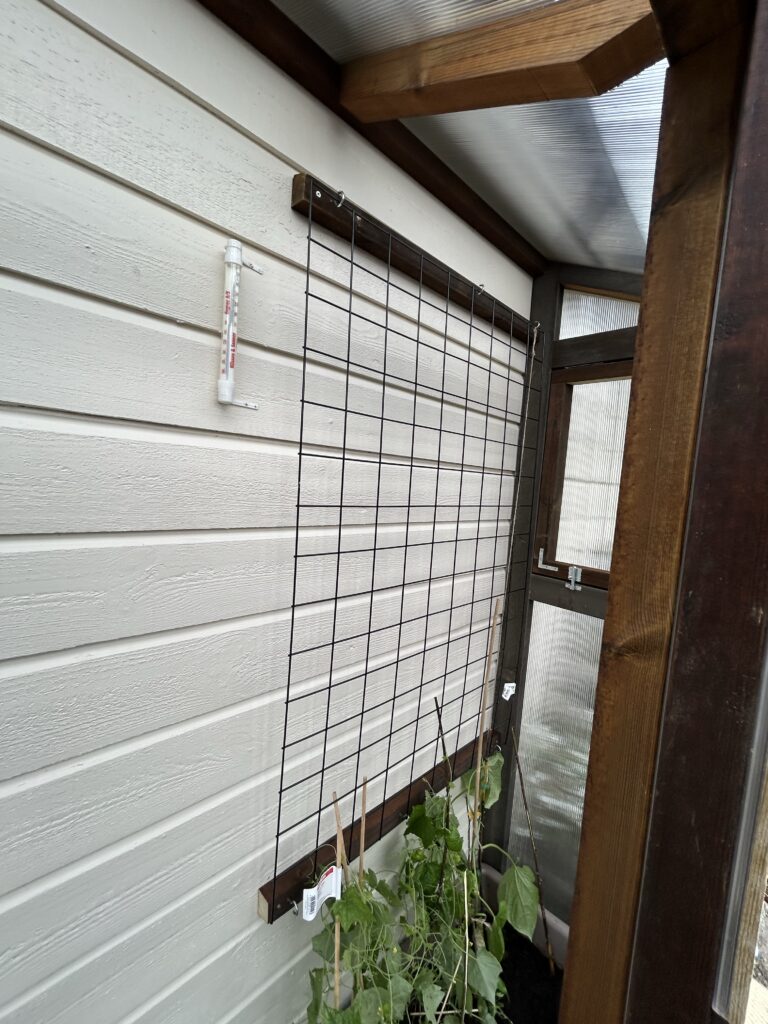
Another piece of gash with four hooks makes it easy to secure ropes for the plants. There is not really room for more than two plants, but I wanted to be able to create more room between the plants if needed.
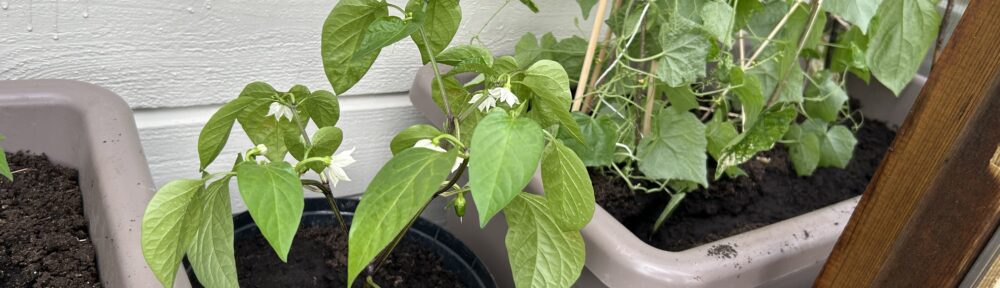
Here’s a few images of the plants. They are small now, but over the summer these will grow really tall and provide us with lots of delicious cherry tomatoes, some black tomatoes (I have no idea what sort) and cucumbers.
Unless the kids get to them first, of course…
And now the waiting game begins. Elsewhere in the garden, we have salad, onions, carrots, potatoes, fruits and berries growing. Gardening is such a reward hobby to have, not to mention rather delicious! And as a bonus, our kids learns how to grow food. And they know that potatoes does not come from the local grocery store shelves… Not that it was a big concern; we live next door to a farm, and the entire municipality is littered with farms. Cows and sheep everywhere!
Which means free fertilizer if one does not wrinkle the snout over pickin’ animal husbandry deuces….🤔
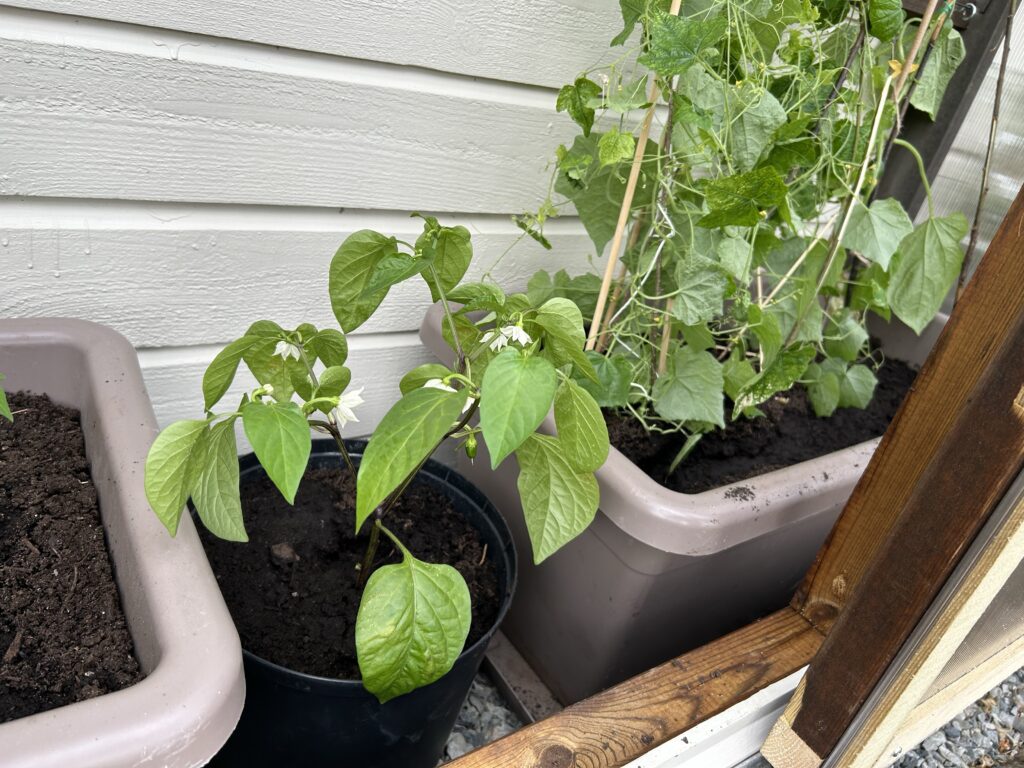
We also got a chili plant from my sister in law. The green house is now filled and in full production.
We’ll set up an automatic watering system with a timer, which will ensure that the plants won’t be starved of water. This makes for easy upkeep, and we can take a week or two vacation without having someone look after our plants every day.
This was a fun and quick project, and it did not cost very much. I had most of the wood left over from other projects, and since I do suffer from a slight case of hoarder syndrome – I had some other “bits and pieces” just “lying around”… The polycarbonate panels costs NOK 189,- a piece, and I used seven of them – about NOK 1400, or $140. The closest over-the-counter green house I could find that is about the same size is NOK 11000, or $1100. Plus shipping, and I would need something to place it on, too. Not to mention that I could not find any models that would fit the available space anyway.
If I had to buy all the wood and if we guesstimate the cost for screws, oil, hinges, etc., I think the price tag on this green house is about NOK 4000 or $400. Quite a difference!
I will oil the light colored wood so that everything blends nicely, and I am on the lookout for a rain gutter tingamabob to go above the door. There’s other things I might want to add, for instance I would like to add an aluminium profile on top of exposed edges on the top of the polycarbonate panels, to avoid water drizzling into the channels. That could be a problem during the winter.
Anyway, now we have a small green house, the tomatoes, the chili and cucumbers are growin’, and we could not be happier with the project!
Just be warned: having a green house will grow on ya…