
Update 11.07.2009
Summer vacation! Sadly, it started bad for me – the last week, I’ve been almost knocked out by some stomach problems, and have slept a LOT. Hopefully it’s over now, so that I can enjoy the beautiful weather. Some work has been done though.
I have painted / varnished all the sharps to their final color. All the pedals are now ready for the last sanding and clear lacquer.
I started by masking the main piece of the pedal so that I could paint the playing surface without ruining the rest of the pedal:
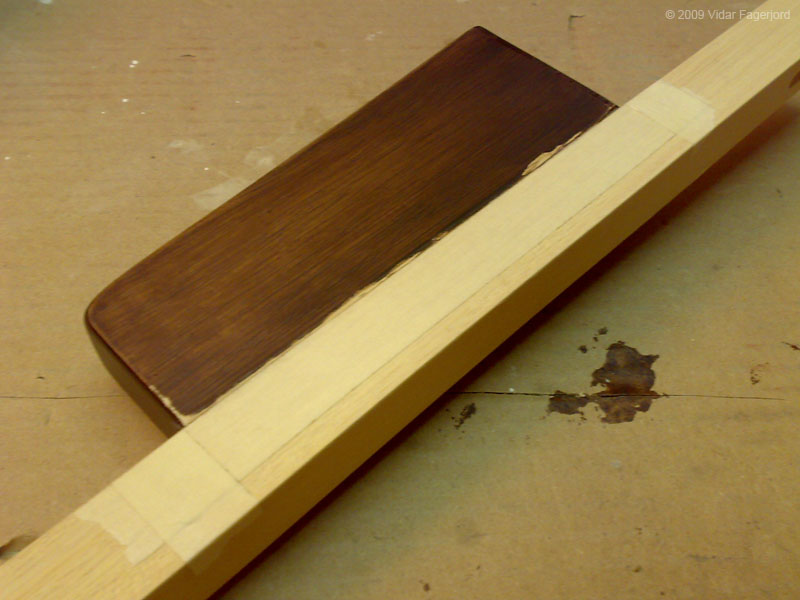
Just some household masking tape placed precisely along the edge of the playing surface. Then I could work with the paintbrush focusing only on getting the varnish evenly distributed.
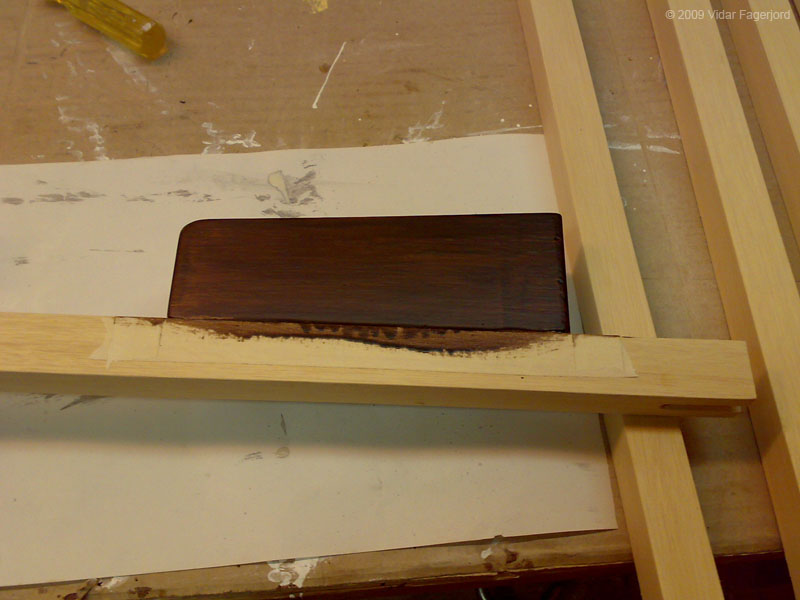
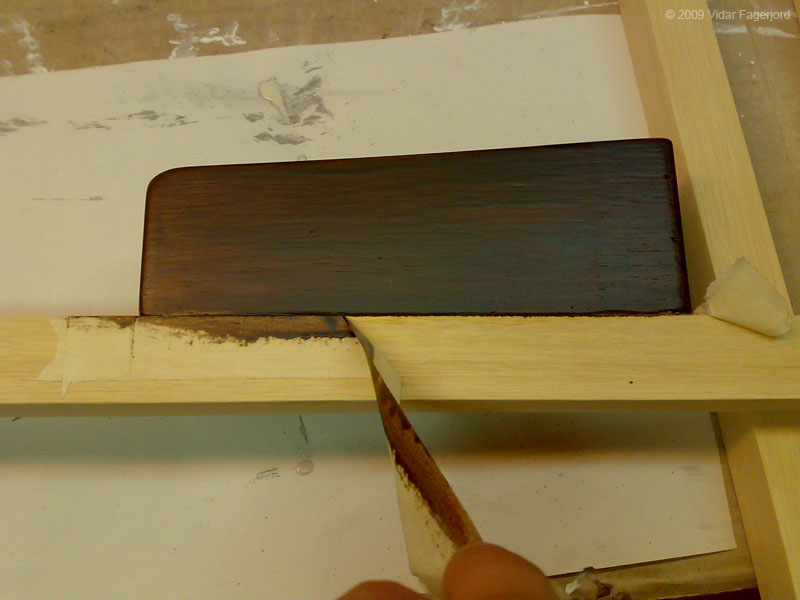
After the varnish had dried and hardened, I removed the masking tape – and the result is perfect! A little fine adjustment by sanding paper, plus a very light sanding with extra fine sanding paper all over (to give the clear lacquer a surface it can “grab”), and the only thing left to do is to add a couple of layers with clear lacquer.
The playing surfaces will get 4-6 coats with clear lacquer in order to build up a wear-resistant finish.
I glued the curved front frame piece to its base, using wooden dowels to strengthen the bond (just like the aft curved frame piece). I used a lot of clamps for this:
As described earlier, each pedal is guided by a dowel pin at the front. The dowel pins runs in the slots I made on the front of each pedal. I used rods of 5.6mm (.22″) piano wire (musical wire) for this. I cut each dowel pin with an angle grinder with a cutting wheel, and formed each pin to the required length (I used 70mm) with the table grinder.
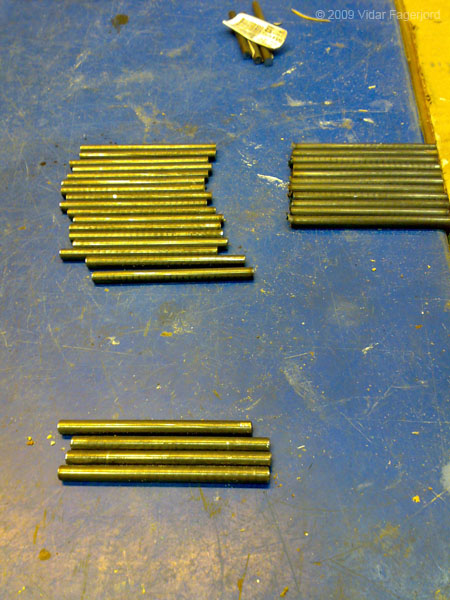
I made 33 pins – one extra in case I would do something wrong in the process. That’s one thing I’ve learnt: make at least one extra of every piece there are more than one of! One extra playing surface, one extra pedal… Should anything go wrong, you will have a spare piece ready to go. And it is MUCH faster making an extra piece while your tools are set up, than making a single piece later on!
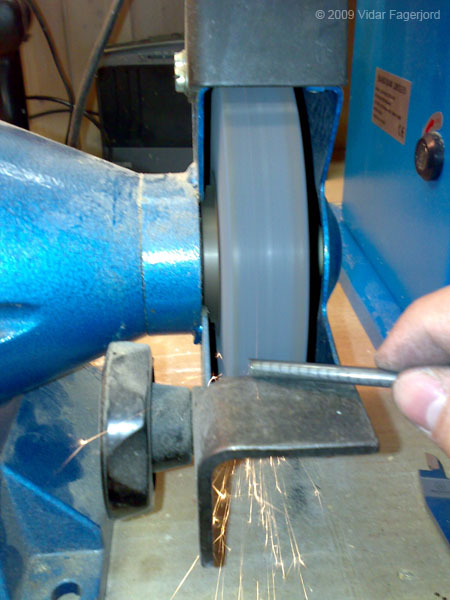
I grinded each pin to the correct length (most was off by .5mm or more due to the eye-balling cutting with a beast of an angle grinder…) and rounded off the edges to make the pins slide into the frame easily – and to prevent anything from being damaged at the top of the pin should there be a situation where it could happen.
33 dowel pins ready to go! And the leftmost pin is too short – good thing I made one extra!
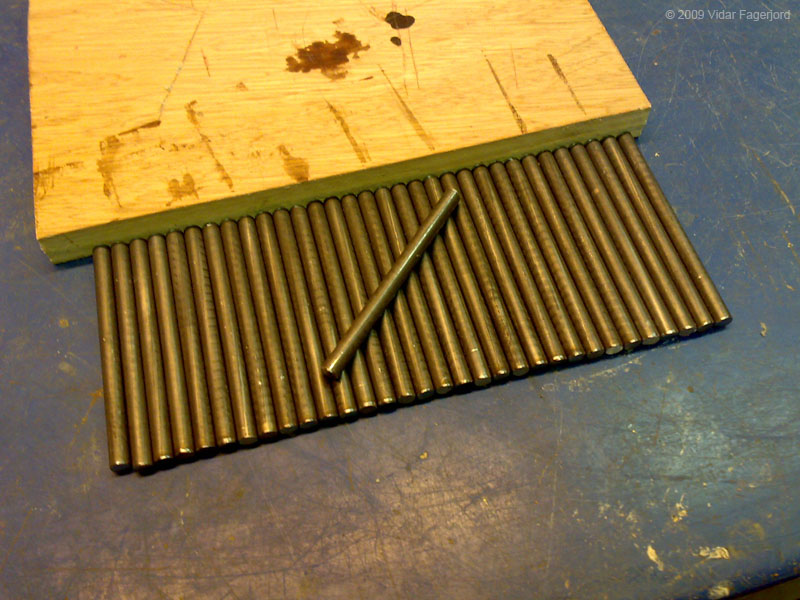
These pins are made to go 20mm into the frame. I will make a tool to get the exact depth when I’m hammering the pins in – simply a wooden block made to the correct length with a hole through it. When the top of the dowel pin is flush with the top of the tool, every single dowel pin will be exactly the same height above the frame. Simple and effective!
I also made a tool for drilling the holes for the dowel pins. Each pin needs to be at exactly 90° to the curved frame (at each pin position) so that the vertical pedal movement follows the arc in the frame. The tool consists of a wooden block with a hole for the drill bit – i used the correct drill bit then sanded the hole slightly larger – and a support plate on each side. I also drilled a hole so that I can check where the tip of the drill bit will hit the frame, and in addition the wood chips have somewhere to go.
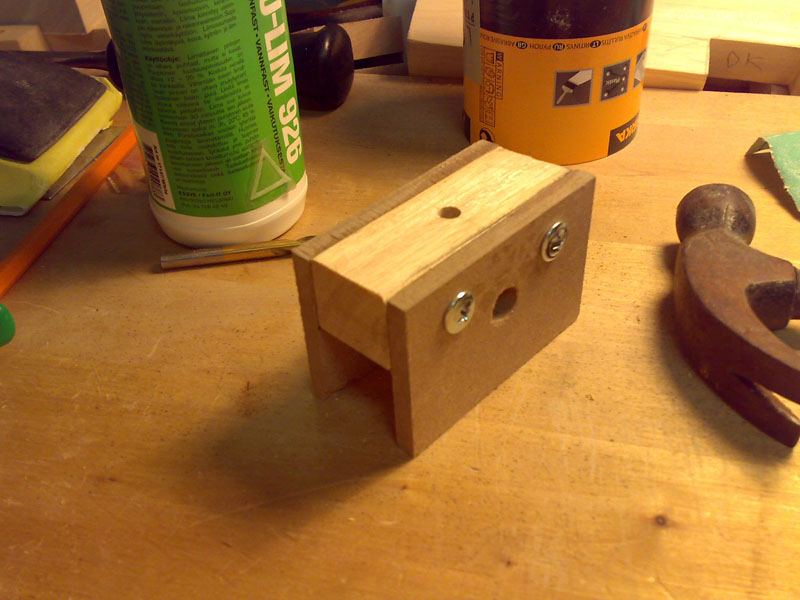
The side plates are glued and screwed onto the wooden piece. PS: the wooden piece is a scrap piece from other areas of the pedal board. Never throw anything away – you WILL need it later on! Great way to save money!
Here’s an image of how the tool will work:

I will adjust the tool to its exact position, then clamp it before I start drilling. The drill bit will have a depth-stopper attached so that every hole is drilled to the same depth.
The dowel pins will just be hammered into the wood. They are 5.6mm, and the drill bit is 5mm. Remember the “proof of concept” test I did? That dowel pin was too short and I needed to remove it. I had to clamp it into the vice and use a lot of force to remove it from the frame! They won’t go anywhere unless I really want them to…
Next up is to drill the dowel pin holes, assemble the pedal board (without the dowel pins – they go in after I’ve added lacquer to the front frame piece) and adjust the length of each playing surface on the naturals, as some of them are a bit too long. Then I’m going to break out the paintbrush and the lacquer for real! I am using water-based lacquer, and it dries within 30-45 minutes depending on the temperature. That means that I could get a lot of layers per day! The first layer needs to be sanded and adjusted though.
Not THAT much left to do. I can’t wait to start using my pedals! But remember: It is soooo easy to rush the final steps just because you can see the end of a project. Just don’t do it – you do not climb to the top of the mountain just to take a quick peak before you return!
Update 13.07.2009
Today I bought a new toy – a combined jointer / planer, so that I can mill my own stock. The only tool I miss now is an electric miter saw. Oh well…
The main task for today was to drill the holes for the dowel pins in the arched front frame piece. In addition, I sanded it down and added the first coat of lacquer. I let the first coat dry and harden over night, before I scrape and sand the surface smooth for the subsequent coats.
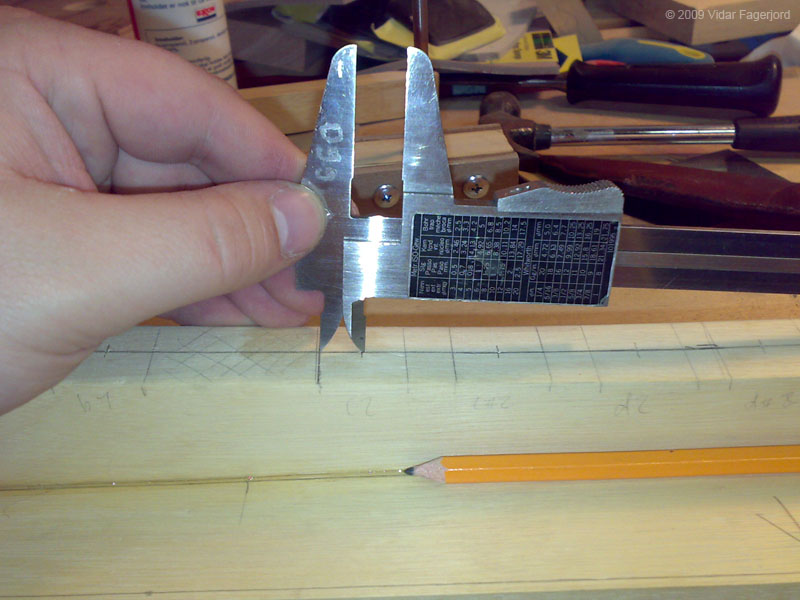
I started by drawing the centerline, a task I simplified by making a small jig. I made a square cutout half the width of the arched frame piece, and cut a small dent / slot in the front so that the pencil tip was halfway embedded in the jig. Then I just had to drag the jig / pencil thingy across the arched piece, and the centerline was established. Since the position for each pedal was marked on the piece from back when I got the final placement of all the pedals (see update 11.11.2008), I could just find the center for each pedal and mark it on the centerline with the caliper. I then traced a line 90° across the curved piece to aid the alignment of the drilling tool I made the other day (see the image just above here).
I then hooked an adjustable depth-guide to the drill bit* so that each hole is exactly 20mm (.787″) deep. All I had to do was to fasten the bit in the drill, center the tip of the drill bit on the line I marked and drill down until the depth-guide hit the drill-guide tool. Simple and effective!
*Note: a simple way to set the depth-guide in this situation is to insert just the drill bit into the guide, align with the mark and tap the top of the drill bit with a hammer until the tip of the drill-bit is embedded in the wood. Then use the caliper to set the desired depth for the depth-guide.
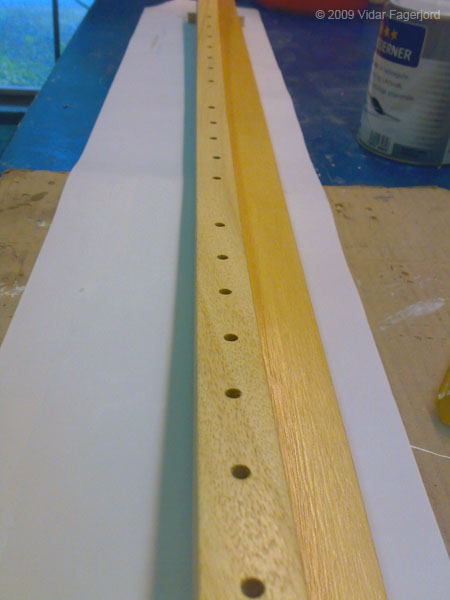
32 dowel pin holes drilled – the only thing left is to drill the hole for the pedal spring, which I will do when the pedals are mounted. That way, I get the exact placement and angle for the spring holes in the curved frame piece. Remember – every pedal meet the frame at different angles.
The last task of the day was to apply the first coat of clear lacquer. I use a water-based lacquer meant for hardwood floors. It dries within an hour, so that you can do many coats per day. And – there are no toxic contents, nor does it smell bad!
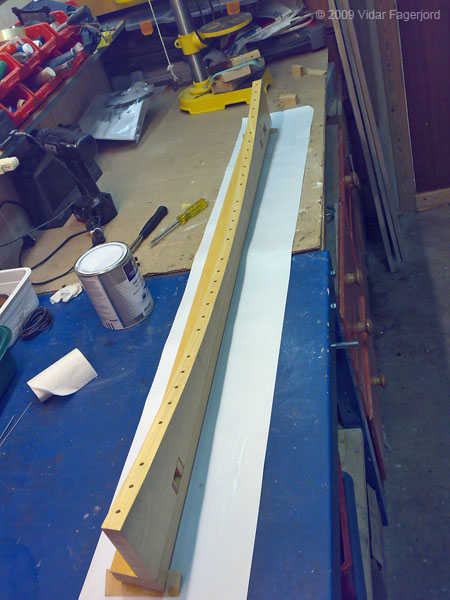
The first coat is applied – note that I rest the piece on triangular pieces of wood. That way I can coat the whole piece, and the support pieces only leaves a tiny line in the finish, which I can remove pretty easily. To remove the sanding marks from that process (makes the surface opaque), I simply use a paper towel with a small amount of lacquer and wipe the sanded area. Dries in minutes and leaves no trace!
Tomorrow, I will add two coats of clear lacquer to the piece, and it is ready for the dowel pins. In the meantime, the lacquer does its job drying and hardening while I sleep. That’s my favvy way to work…
Update 16.07.2009
The jointer / planer is a fantastic piece of equipment! I bought some 100mm (3.93′) floor moldings made from oak for the toe boards. I jointed one side and one edge and then ran the pieces through the planer. They started out about 8mm (0.315′) and ended up being 5mm (0.197′). Since I stack three of them, the toe boards will be 15mm (0.59′) thick. Should be very sturdy!
The curved toe boards will follow the 9″ radius of the curved frame pieces. I made a simple jig for the glue-up by cutting the curve in three pieces of floor beams (buy the cheapest wood you can find). I glued the three pieces together, then smoothed the jig so that there is no ridges or bumps.
Tip: make a template from MDF or similar, then use the router and a copying bit to smooth the curves (you need to rough-cut them first). Saves you a lot of time!
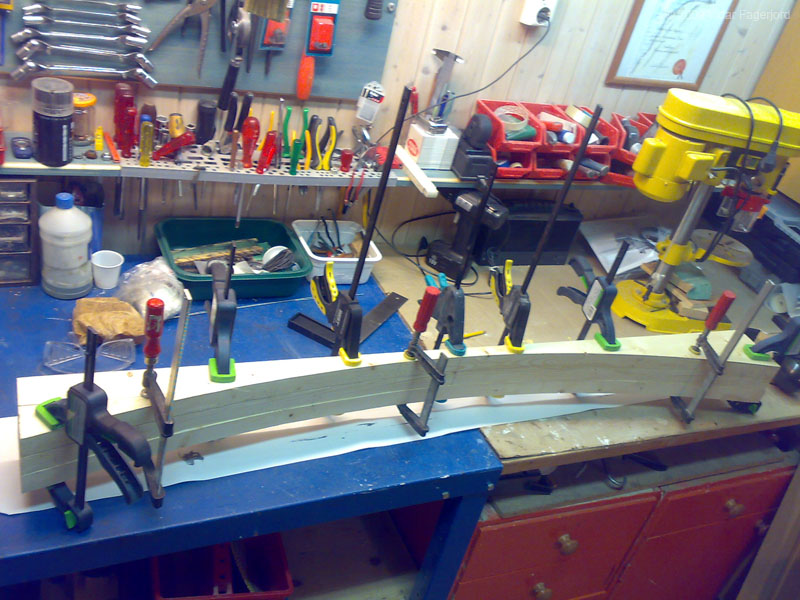
I applied glue to each joining side of the three toe board pieces, stacked them and placed them on the jig. Then I used a clamp to press them into the jig at the center (be sure to mark the center of your jig, and the pieces being laminated). I continued adding clamps until the pieces was firmly formed to the jig. Remember that when you’ve added a clamp to the left of the center, you need to add a clamp at about the same distance from the center on the right side. This ensures that the pieces can slide on each other. Since the top piece has a slightly smaller radius than the bottom piece, it will slide out over the end a bit.
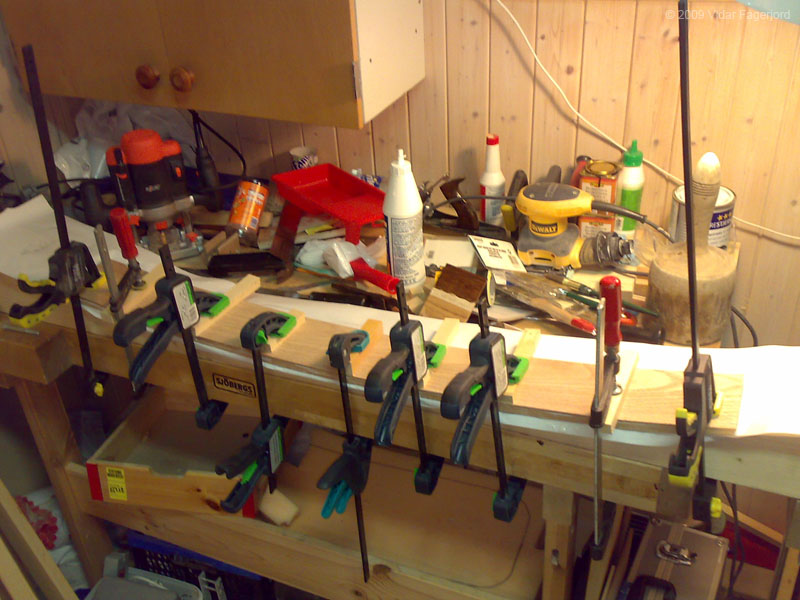
I used scrap pieces of wood to protect the wood from the clamps – and to distribute the pressure over the whole width of the toe board. I really need to invest in more F-clamps (the metal ones that looks like an F) since they can produce FAR more pressure than the quick-clamps. You can clearly se why in the next image:
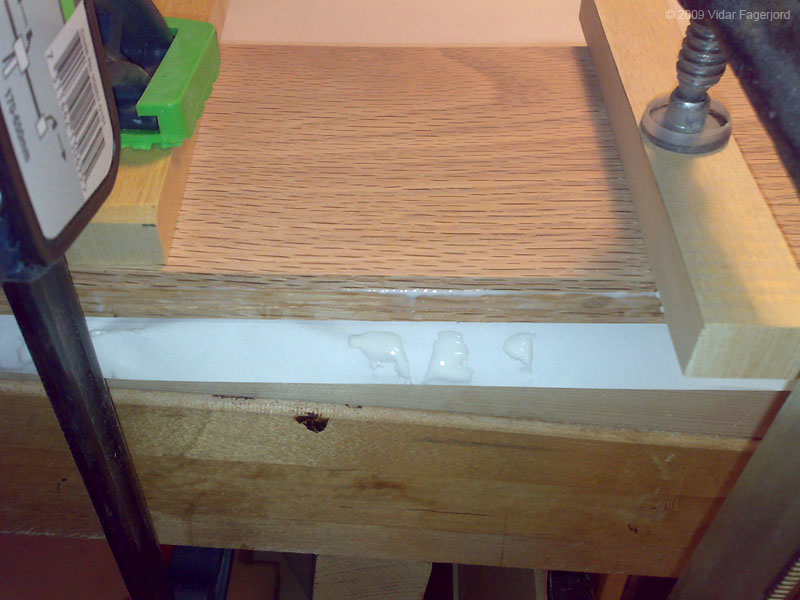
See the squeeze-out under the F-clamp? I solved the problem by using a F-clamp to press the pieces together at all the quick-clamps, then squeezed the quick-clamps as hard as they would go. Should do the trick.
As you can see on the above image, the end grain of the wood lines up so that the curved toe board will look like it was made from a single piece of wood. That was the primary thing that got me to buy hardwood instead of plywood. A lot more expensive, but the result should be VERY nice! You can of course use plywood, but the sides will show the stripes very good. An option could be adding veneer strips or painting the edges black as a decorative element. That’s entirely up to you. I want a consistent look, so… Oak it is!
Can’t wait to see the end result! I have never laminated wood before, but I am confident that this should work nicely. The jointer / planer is a crucial tool in this process, since I can make perfectly square, parallel, straight and true surfaces on the pieces. Note: I roughed the surfaces with some 80 grit sanding paper and a sanding machine so that the glue will get a good grip. The jointer / planer makes a VERY clean surface – almost ready for varnishing!
I did not do anything to the last edge, since the toe boards will be cut to follow the radius of the pedals.
Tomorrow, I will make the front toe board. And I am going to borrow a load of clamps from my uncle – I do not have enough clamps for the wider piece. Guess there’s something to the woodworkers saying “you will always need more clamps no matter how many you already have”…